
Crafting Beauty: The Art of Pressed Flower Glass Pendants
Hi, I’m Nichole, the creator behind LaRue Stained Glass, and today I’m excited to take you behind the scenes of how I make my pressed flower glass pendants. These little treasures are a perfect blend of nature and craftsmanship, and each one is made with a lot of love and care. If you’ve ever wondered how I turn a simple flower into a beautiful pendant, here’s a step-by-step look at my process!
1. Picking the Perfect Flower
 The journey begins with selecting the perfect flower. I take my time choosing flowers that have the color and shape that feels right for the piece—ones that will look beautiful preserved inside glass. Many of the flowers I use are from my own garden, but I also source others from suppliers online.
If I'm pressing my own flowers, I press them using book or heat methods. The pressing process is crucial because it preserves the flowers in a way that allows them to retain their unique beauty. Once the flowers have been pressed I often use color enhancing techniques to make the colors pop.
If you can't wait the few weeks to press your own flowers there is no shame in buying them online.
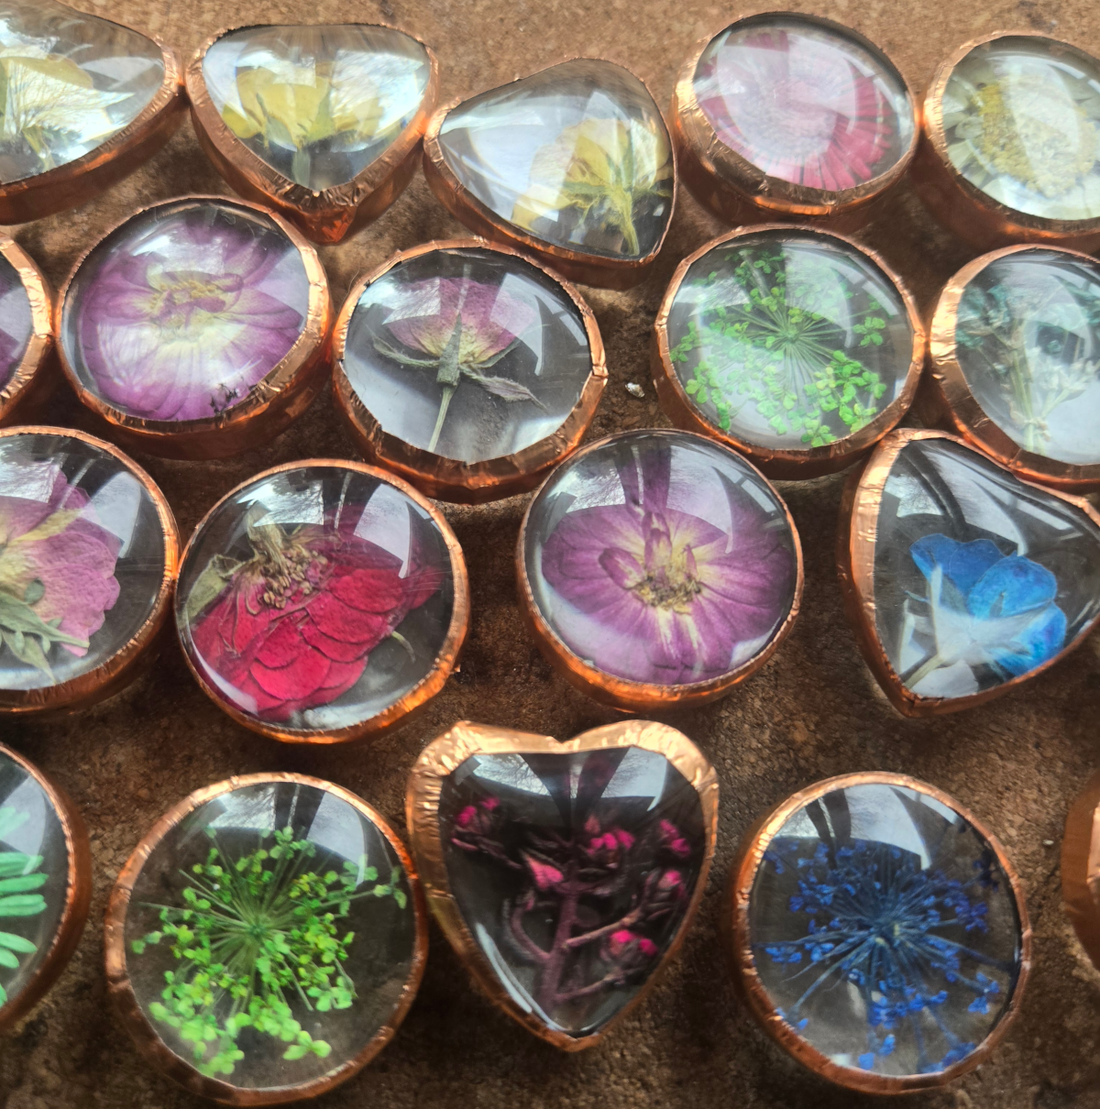
2. Choosing the Glass Shape
The next step is picking the glass shape. I offer two options for my pressed flower pendants: a simple circle or a heart shape. Both are great choices, but each gives a different vibe. The glass I use is clear, which allows the pressed flowers to stand out and lets the light shine through the petals and leaves in the most magical way.
Once I’ve decided on the shape, I carefully prepare the glass to hold the pressed flower. Pro-tip use soft plastic clamps to hold both pieces together once the flower is placed. This will help with the next step of copper foiling.
3. Copper Foiling and Pewter Soldering
 Now, it’s time for the copper foiling. I prefer black-lined copper foil in a 1/4in for this. Make sure to try to even the lines as you wrap your glass pendant. It’s an essential step that allows the next step of the soldering process to take place. Your lines will determine where the solder goes and how it looks.
After the copper foil is in place, I move on to the soldering phase. I use Canfield's lead-free pewter finished solder to join the edges of the copper foil. The solder creates a strong bond, while also giving the pendant a smooth, polished finish. The pewter solder adds a soft metallic shine that complements the piece.
4. Shaping and Sanding with a Dremel Tool
Once the soldering is complete, I refine the pendant’s edges using a Dremel tool. This is a critical step because it allows me to perfect the shape of the pendant and smooth out any rough edges. I take my time here to soother and shape them down until I feel comfortable with the look of piece. Sometimes, they're more rugged and sometimes they're more soft looking. There's no wrong answers here. Just shape it until you feel it's done. Just be careful to not take all the material off down to the copper foil.
Optional: After shaping the metal, sometimes I opt to sand it down using a finer grain of sandpaper to remove any imperfections and to create a seamless transition between the glass and solder. This process makes the pendant feel smooth to the touch and ensures the overall finish is higher-quality. If you like the rougher look of the Dremel tool finish that's ok too. So do I!
5. Finishing Touches: Silver Pewter or Aged Patina Black
One of the last steps in creating each pendant is choosing the finish. I often struggle between two options here: a polished silver pewter or a rich aged patina black.
The silver pewter finish means you're done here and ready to wax your finished piece.
The aged patina black finish, on the other hand, adds a vintage, rustic charm. The darkened solder contrasts beautifully with the colors of the pressed flower so if this is your choice grab some patina. I like to use a paint brush to even cover the outside of the metal.
6. Wax On Wax Off and Protectants
Finishing touches you'll want to do it finding some wax or polishing compounds that work with both glass and metal. Follow directions on the label which often include polishing with a microfiber cloth. The very last step for me is using a protectant sealant. My favorite is Eternal Jewelry Coating. It protects both the piece and helps prevent allergic reactions for those sensitive to metals.
7. A Pendant that Tells a Story
For me, each pendant isn’t just a piece of jewelry; it’s a small work of art that tells a story. From the selection of the flower to the final polish, every step is a reflection of my passion for combining nature with craftsmanship. Each pressed flower pendant is a unique expression of the beauty I see in the world around me.
When you wear one of my pendants, you’re not just wearing a flower—you’re wearing a tiny piece of nature, captured and preserved forever. Whether it's a gift for someone special or a treat for yourself, I hope these pendants bring a little bit of nature’s beauty into your life.
If you’re ready to add a handmade, one-of-a-kind pressed flower pendant to your jewelry collection, take a look at my creations. I can’t wait for you to find the perfect pendant that speaks to you.